Spiced Christmas Cookies

Because it is never too early to start browsing for new Christmas recipes or baking Christmas cookies 🙂 These cookies are lovely: they are crunchy, spiced and full of flavour, and if you take some time to decorate them, you can hung them from your Christmas tree as little ornaments 🙂

The recipe calls for a handful of spices but if all you have is cocoa powder and cinnamon go for it, you’ll still make some amazing cookies. However, if what you want is simply out-of-this-world- cookies, try making them with all the listed spices. Also, I made mine with coconut oil, which adds a bit of its own flavour, but you can make these with butter if you prefer.

Ingredients (makes 18-25 depending on size of cutters):

2 cups of flour

2 fat tablespoons of  cocoa powder (I use Bournville, which has no added sugar and is very good)

3/4 cup of honey

80 g coconut oil (or you can replace it with 100g butter)

1 egg.

1/2 teaspoon baking powder

2 teaspoons cinnamon

1 teaspoon ground  ginger

1/2 teaspoon nutmeg

1/2 teaspoon cardamom

(and if you manage to get your hands on some: 1/2 a tonka  bean, grated.)

Zest of 1 lemon

pinch of salt

To decorate: 

250 g icing sugar

1 egg white

1/2 teaspoon lemon juice.

Sprinkles, m&ms, edible glitter etc.

How to:

1.- In a bowl mix the flour, baking powder, spices, salt and grated tonka bean.

DSC08329

2.- In another bowl beat the honey with the coconut oil (or butter) at room temperature until the mixture becomes creamy,  light and pale.

DSC08333

3.- Add the egg and lemon zest to the mixture of honey and coconut oil. Whisk until the mixture is smooth (it will look as if it were curdling at first, but keep whisking until everything comes together).

DSC08336
DSC08337

4.- Add the dry ingredients and using  wooden spoon mix everything until you have a pliable, soft dough. If the mixture is too dry (this happened to me because my egg was too small), add either 1 egg yolk and keep the egg whites for the royal icing, or slowly add some milk (a bit at a time, remember you don’t want you dough to be too wet).

DSC08340
DSC08341

5.- Place in the fridge, wrapped in cling film for 1 hour. If you want, you can keep this dough in the freezer for up to 1 month; then take it out the night before you want to use it and place in the fridge. In the morning it will be ready to be rolled and cut out.

6.- After an hour, roll the dough out in between two sheets of baking paper. Roll to a 3mm thickness. Then cut your cookies and place them in the fridge, again, for 1 hour (or freezer for 15 minutes) before baking.

DSC08514
DSC08518

7.- Bake for 7 minutes in a preheated oven at 180. They should be dry and only slightly browned. Place in a rack to cool…

DSC08520

While the cookies cool down, you can prepare the icing by whisking together the egg white with the icing sugar and a few drops of lemon juice…

DSC08522

Whisk for 5 minutes, until you get a soft, creamy texture. Your icing should be runny enough that you can pipe it easily, but not so runny that it dribbles down the cookie.

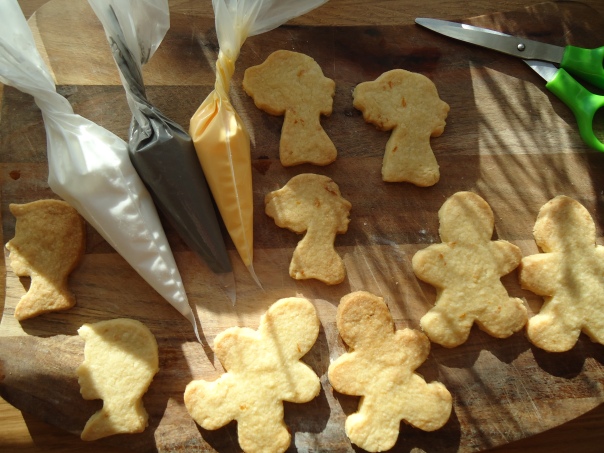
To decorate, you can pipe different designs, add some sparkles for colour or simply follow the edges of each cookie with a bit of white icing.

Make sure you have everything you need before you start decorating, as that will keep the mess to a minimum (at least that’s what happens at home).

DSC08523
DSC08526

Enjoy Christmas better with some home-made treats!

DSC08532

Namaste,

Paula

Spooky Halloween Cookies

DSC07822I love decorating cookies, but because we’ve been trying to cut down a bit on the sugar,  these days I get to do it only on especial occasions, like Christmas or Halloween, and therefore when the time comes I tend to go a bit nuts, baking a million cookies at a time and splattering icing all over the place.

I’m not ashamed to say (should I? Not sure why I wrote that ) that since arriving in this country I have embraced Halloween wholeheartedly. It is such a fun celebration! Carving pumpkins, decorating the house, making spooky cookies and desserts. The child inside me really loves it 🙂

These cookies are shortbread, which keeps its shape really well when baking, and therefore makes for an excellent base for the cameo cookies which might have otherwise just turned into an awful blob when baked. Gingerbread men are more forgiving…

DSC07823You can use whichever cutter you have at hand really, for these ones I used a gingerbread man cutter and some cameo cutters I bought at a Sale and thought I was never going to find a use for.

The “stitched” look means that you can pretty much take any shape of cutter you have and by giving the cookie a couple of stitches make it spooky. Like a stitched, bleeding heart, for instance.

I have also discovered that a bell-shaped cookie cutter makes very good ghosts . Just use the rolling pin to stretch the bells into ghosts:

DSC07827

Ingredients for 25 (big) cookies

 200 grs plain flour

40 grs fine semolina

80 grs caster sugar

160 grs butter, chilled and cut into cubes.

1 pinch of salt

3 tablespoons of cold water

Zest from 1 orange.

How to:

Quite easy actually!

1.- Place the flour, salt and semolina in a bowl. Add the butter.

2.- With your fingers rub the flour into the butter until you get quite a grainy/sandy mixture.

3.- Add the zest and the water and then use your hands to press everything together into a dough. Add a bit more water if you think you need to. It is going to be a crumbly dough.

4.- Wrap in film and place in the fridge for 1 hour.

5.- After an hour, take the dough out and roll into a floured surface or a surface covered in baking paper.

Roll it to 1/2 cm thick and cut your cookies. Before baking, place the cookies in the fridge for 1 hour (or the freezer for 20 minutes) that way they will better keep their shape.

DSC078246.- Bake in a preheated oven at 160 C for 25-30 minutes. Keep an eye on them so they don’t burn or brown too much. If your oven does not bake evenly, turn the tray around after the first 20 minutes.

For the Royal Icing

250 grs icing sugar

1 egg white

Lemon juice (1 teaspoon approx).

1.- Place the egg white, sugar and 1 teaspoon lemon juice in a bowl and whisk until its glossy and you can form soft peaks on the mixture. Note: Depending on the size of your egg white you might need to add a bit more lemon juice to get the desired consistency.

DSC07809

2.- Divide into as many colours as you are going to use and add the food colouring. I bought Dr. Oetker colouring, and they are not very good, it took a lot of colouring to get a decent shade of red, and I never managed to make black icing at all, it never went any darker than grey. So if you can buy another brand, do.

DSC07811Then place the royal icing on piping bags. One way to do this easily is by placing the piping bag on a glass and then filling it, this way you are free to work with both your hands.

DSC07810

3.- Now, once the cookies are cold you can start decorating them. Place everything you are going to need on your working surface.

DSC07812

You can start by doing all the details of the same colour, I started with white. Then move on to the next colour, this way you prevent your icing from hardening on the piping bags through exposure to the air.

DSC07814

 DSC07817Let them dry and enjoy or give away 🙂

DSC07841Namaste and Happy Halloween!

Paula

Autumn Baking

Super Easy Halloween pops made with oats and Nutella, not cake.

I was looking at my older posts in search of a recipe for peanut cookies which I made for Halloween one year, but I never found it, maybe I never made a post about them, and they were not on my recipe notebook so I can only assume they were written down in some scrap of paper that ended in the bin (sad really, and the reason I have a recipe notebook and I still manage to lose recipes {sigh}) .

Anyway, I never found that recipe, but I did come across many that I had completely forgotten about. I know some people claim they remember every single recipe they ever posted about, but I don’t. Mainly because for a time I get obsessed with something, say, scones, and will be baking scones like mad for a year or so, using a million different flavours and shapes, and then I would discover something else that takes my fancy, and never thing about scones again, because I am now crazily baking cookies or juicing or making nut milks etc.

When I encounter those sort-of- cakepops (there is no cake in them, you see) it was like reading about a recipe from someone else’s blog, that is how much I’d forgotten about them.

Anyway, going through the recipes I found some oldies that I thought I’ll re-share here, because they were great for the season and but I don’t see myself baking for another couple of weeks, though I have some really great recipes for Chipa (sort of a tiny cheese bread or puff from Argentina), fig and plum crumble, savoury cantucci and sweet potato bread, which I am dying to try.

Walnut and Date Bread

This was one of my favourite breads for a very long time. I was baking everything with spelt flour at the time, so most of the recipes had to adapt for the fact that spelt doesn’t quite work the same way as your typical white bread flour, but it has such a great nutty flavour, I found it works great with fruits and nuts.

Pumpkin Latte

I’m not into lattes any more, but I had a period when I loved them, and tried to make many at home. The Pumpkin Latte was surprisingly good, and I drank it for longer than some of the Matcha concoctions I created in my kitchen (though some of them were quite tasty).

Simple Pumpkin Cake

Apple Pie (dairy free pastry)

These little apple pies are great and you can freeze them, so you can make a good big batch and keep them in your freezer for those cold winter days when the body craves something delicious but at the same time all you want to do is stay under the throw watching Hallmark movies or reading a book. Keep them in your freezer I say, because, they bake from frozen so in 20 minutes you have home-made, warm apple pie in your hands, and what more can we ask for in life?

Have a wonderful day!

Paula